
Automating Genesys Cloud with n8n
Genesys Cloud’s user interface allows you to do an awful lot, and for what it can’t yet do you have their Platform API. However, leveraging the Platform API requires writing code to handle retry mechanisms, rate-limits, pagination etc. All of which can be quite daunting. But not anymore!
I have created an open-source n8n Genesys Cloud community node. It allows you to leverage n8n, one of the world’s leading workflow automation platforms to easily create workflows that interact with Genesys Cloud to do tasks such as:
Generating custom reports
Automating user provisioning / syncing between environments
Auditing user permissions
Triggering alerting
and much more…
What is n8n
For those who haven’t heard of n8n, it is one of the world’s leading workflow automation platforms. It offers, amongst other things:
An exceedingly simple interface - where you visually connect actions to make a workflow
Support for over 1k integrations, and an extensive range of community integrations.
An incredibly supportive community
The ability to create, maintain, share and execute workflows
Accessing n8n is possible by:
Creating a demonstration workflow
As always, let’s learn by doing…
We’ll use the Genesys Cloud community node to create a workflow that reports on User’s roles, Skills, Groups & Queues in your organisation. At the end we’ll then touch on how it could be extended to include data from the likes of Salesforce, MS Dynamics CRM 365, Zendesk etc

The workflow we’ll create will:
Get all the users in the organisation
Get the queues for each of the users
Format the data
Convert to a CSV
The resulting CSV will contain the User ID, Name, Email, State, Roles, Skills, Groups and Queues of all users.

Installing Genesys Cloud community n8n node
My community node has been verified by n8n, meaning it is now accessible directly from the n8n UI.
To install it:
Search for Genesys Cloud in the nodes pane
Click Install node
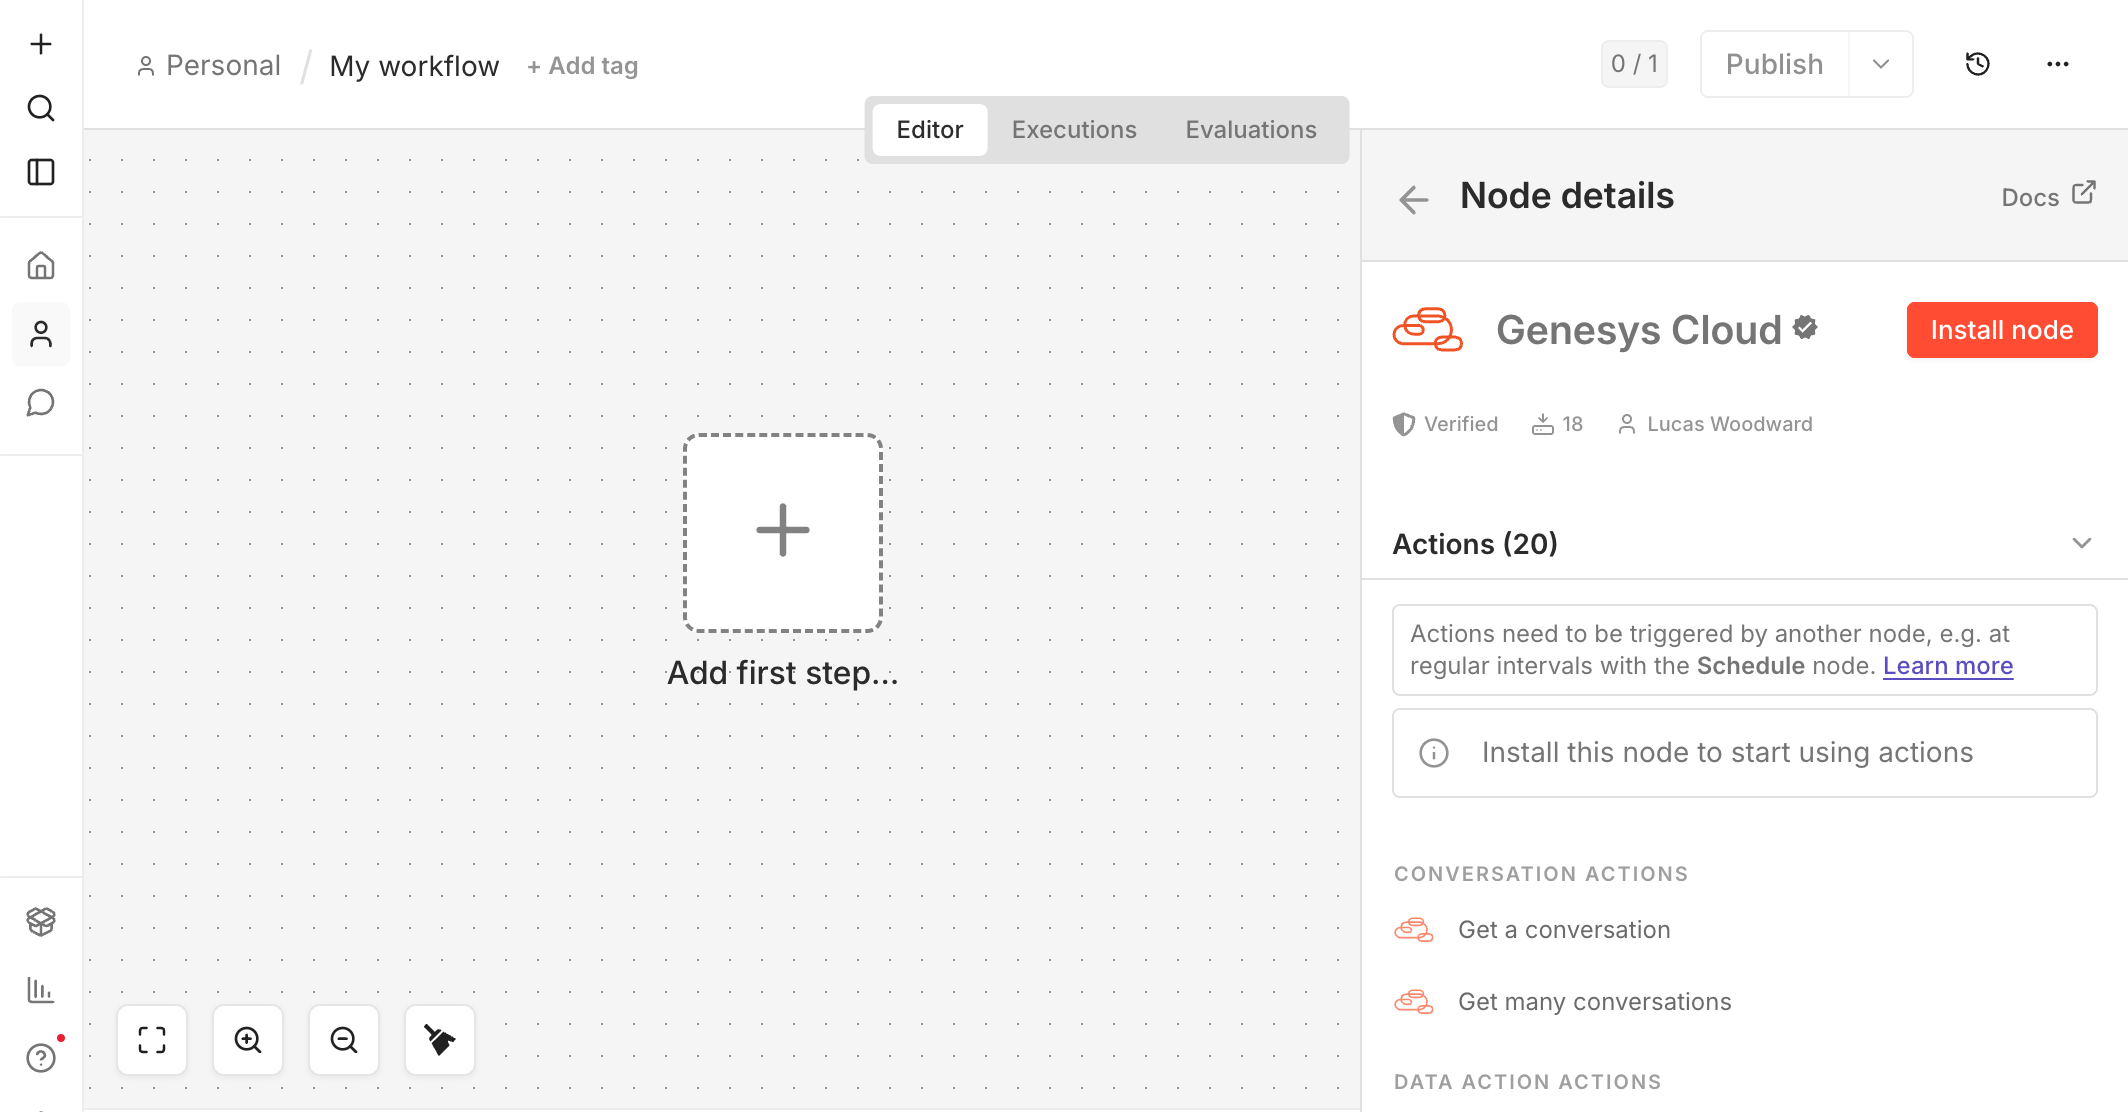
Creating an OAuth Client
I’ll pre-emptively mention setting up credentials, which you will have to do in the next step. When you add your first action in a minute you will be presented with the ‘Credential to connect with’ box in red.

Add your Genesys Cloud org’s OAuth Client by:
Clicking the box and selecting ‘Create new Credential‘
Supplying your OAuth Client’s ID, Secret and Region
Clicking Save

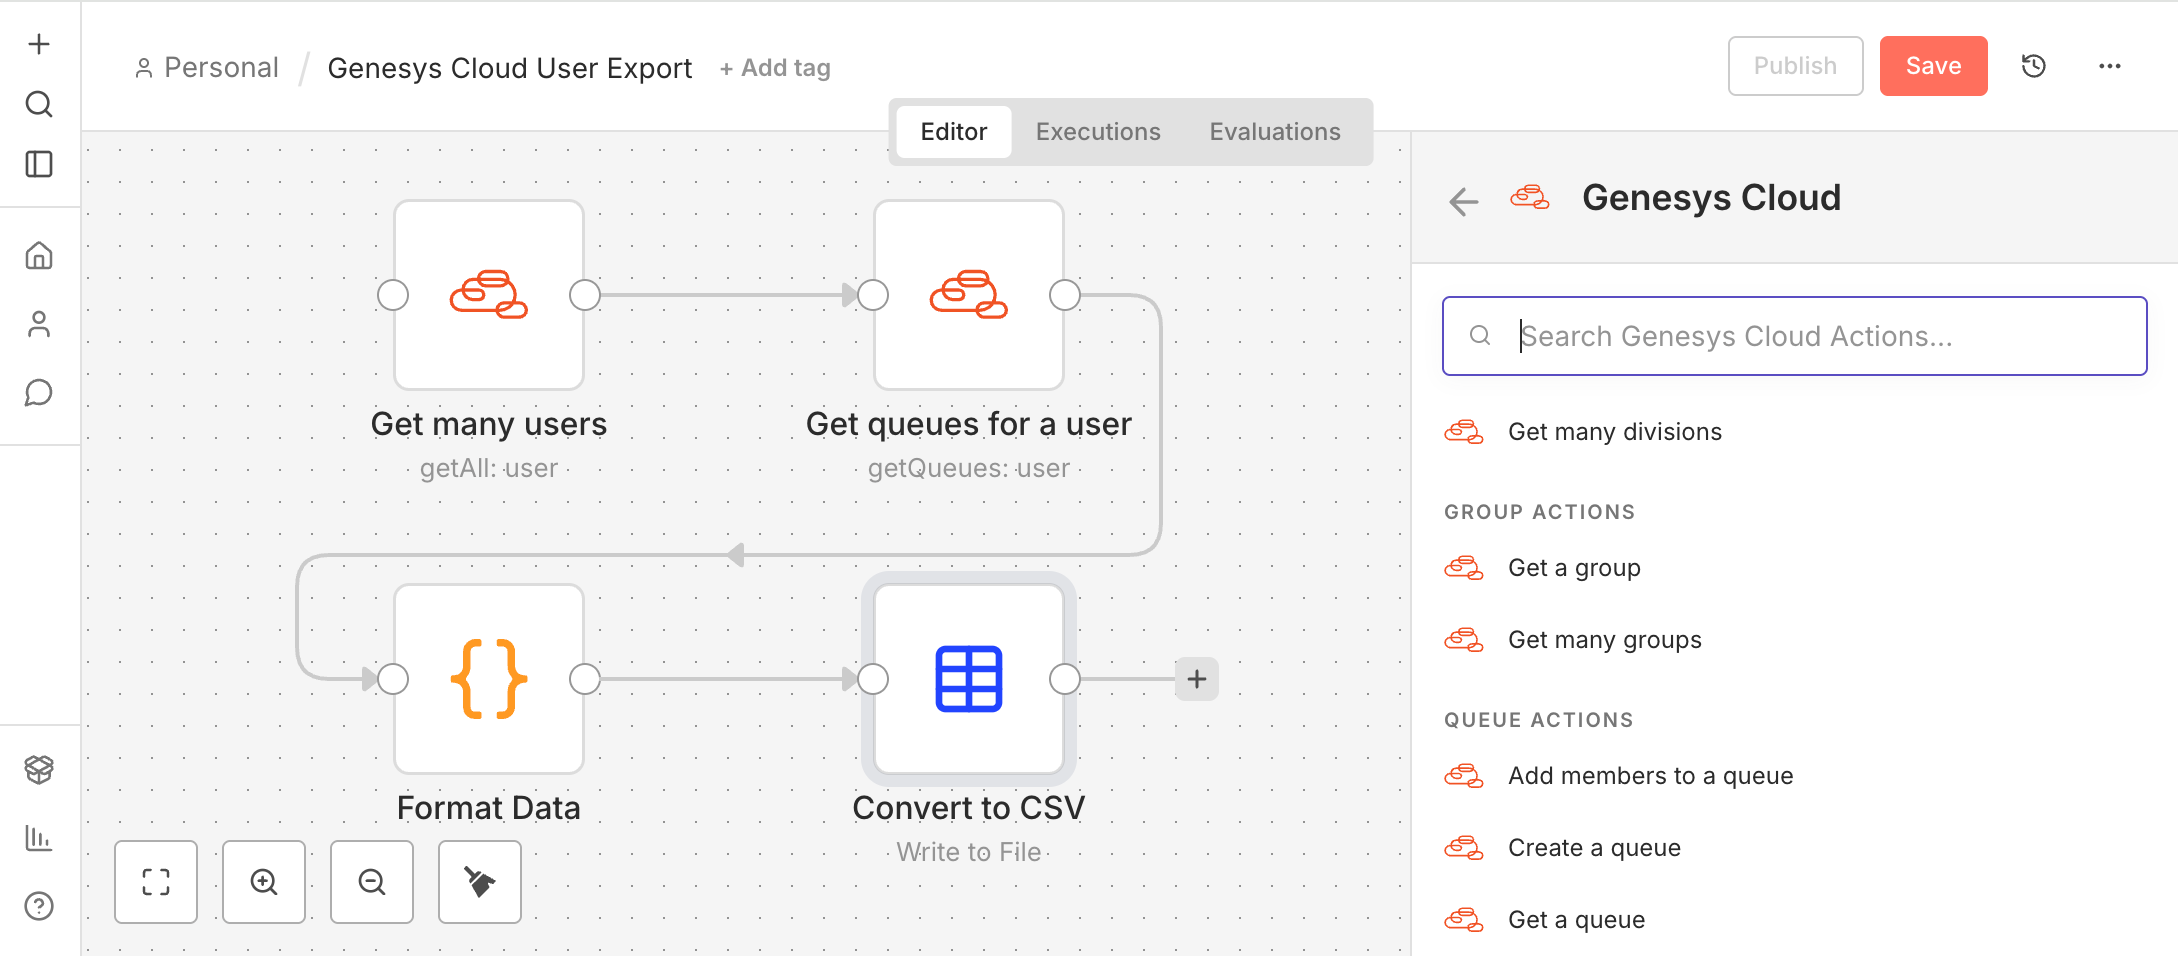
Retrieve users and their assigned queues
We start the creation of the flow by attaching two Actions to a Schedule Trigger node:
Get many users - returns all users in the Genesys Cloud org
Get queues for a user - for each user return all their assigned queues

The video below shows the process of adding these nodes:
Transform data into a CSV report
Now we have all the data for our report (users and their assigned queues) I’ll show how, even though n8n allows for code-less automation, you can always add code if you want to.

I take the data amassed from the previous actions and use the Code In JavaScript node to collate it into a response that the next node will Convert to a CSV file:
The code that is used to collate the user data and their assigned queues is below:
const users = $items("Get many users");
const allQueues = $items("Get queues for a user");

// Helper to extract names from arrays like roles, skills, or groups
const formatNames = (arr) => (arr ? arr.map(i => i.name).join(', ') : '');

return users.map((userItem, index) => {
  const user = userItem.json;

  // Filter queues linked to this specific user index
  const queueNames = allQueues
    .filter(q => (Array.isArray(q.pairedItem) ? q.pairedItem[0].item : q.pairedItem?.item) === index)
    .map(q => q.json.name)
    .join(', ');

  return {
    json: {
      "User ID": user.id,
      "Name": user.name,
      "Email": user.email,
      "Title": user.title,
      "Department": user.department,
      "State": user.state,
      "Last Login": user.dateLastLogin,
      "Roles": formatNames(user.authorization?.roles),
      "Skills": formatNames(user.skills),
      "Groups": formatNames(user.groups),
      "Queues": queueNames
    }
  };
});
Running your workflow
Now we have created the entire workflow you can run it by clicking ‘Execute workflow’, or by adjusting the Schedule Trigger.
The output will be a CSV file like below attached to your Convert to File node:
You could next have a go at extending this workflow to email the CSV to you.
Integrating with other systems
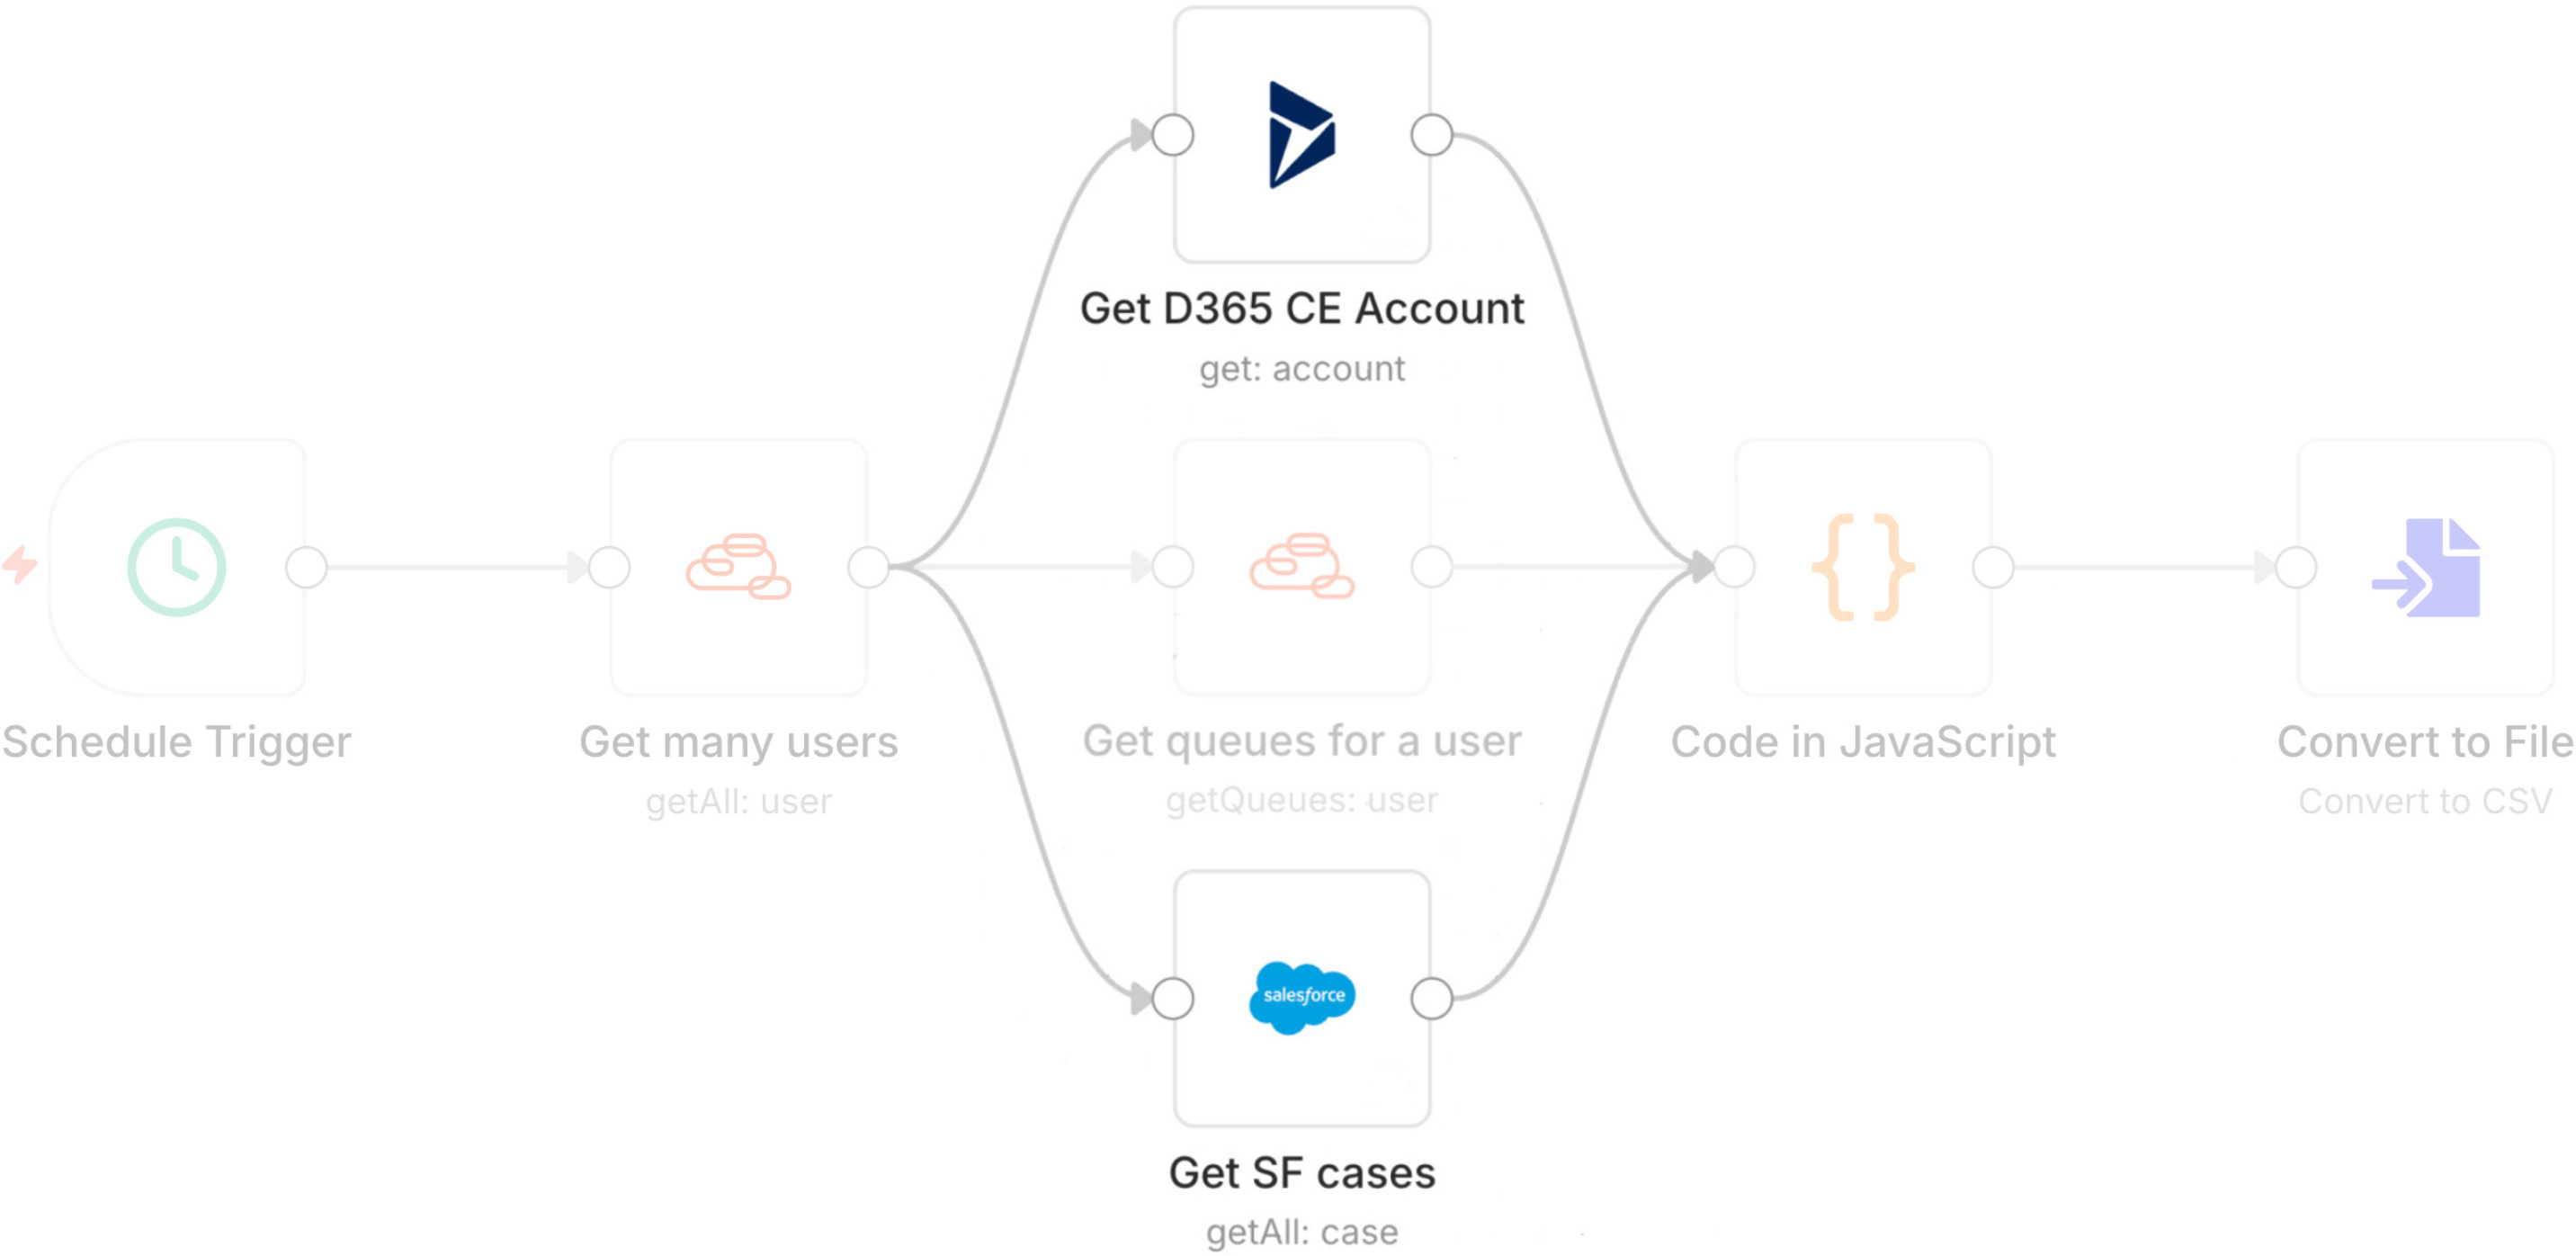
I have shown a workflow that only extracts data from Genesys Cloud. However, that’s only scratching the surface of what’s possible with this node and n8n. There are many other systems that n8n integrates with, making it possible to collate data from across your company’s estate. Systems such as Salesforce, MS Dynamics CRM 365 and Zendesk are all supported.
Conclusion
This article has provided a whistle-stop tour demonstrating just how easy it now is to create workflows for Genesys Cloud by using my Genesys Cloud n8n community node.
I will be continually extending it to cater to as many use-cases as I can think of. If you have a use-case you would like it to support then I’d love to hear from you!
Also, please do share what you make with it. I love seeing the ingenuity of the Genesys community.